Looping Through Data


I don't know about you, but I often organize students with google sheets. I use rows for each student and columns for information related to the student. Sometimes I need to push this informatiuon back to students or parents. Sometimes I have do something else with the information. It’s helpful to know how to get the data and work with it in a loop.

Spreadsheets are a two dimensional arrays. There is information in Rows, dimension 1,  and information in columns, dimension 2. We can target each cell by knowing the proper row and column.

We can also loop through each row and do something with the data. 

Computers start counting from 0. Google Sheets starts counting the informational rows and columns from 1. I will also use my own label in row 1 to identify the column number. This way I can insert columns and move them around and still retrieve the same information. Let’s start with identifying the columns by our own labels and setting the column number to a variable which makes sense to us. 

function loopThroughData(){

  var ss= SpreadsheetApp.getActiveSpreadsheet();
  var sheet= SpreadsheetApp.getActiveSheet();
  var emailcol = getColumnByName(sheet, "Email");
  Logger.log(emailcol);
}

function getColumnByName(sheet, name) {
  var range = sheet.getRange(1, 1, 1, sheet.getMaxColumns());
  var values = range.getValues();
  for (var row in values) {
    for (var col in values[row]) {
      if (values[row][col] == name) {
        return parseInt(col)+1;
      }
    }
  }
}

A function called getColumnByName is used in our loopThroughData function. It’s used with two variables pushed into it. The first is the sheet we are working on and the second is the column name. This function runs and will return the column number if the column name is found. The program returns to the loopThroughData function and completes the script Logging the column number. 
This begins to give us some flexibility with the sheet. We can add and move columns and not work about breaking our program. We can run it and we’ll see the column number returned in the log. The intent here is to be able to loop through and use data in a full sheet. We know how to get the column numbers but what about the rows and the rest of the data. 

Efficiency in code so far doesn’t seem like a big deal. We’ve looked at very little data. But if we were to use an entire sheet composed of the maximum 5,000,000 cells (as of the newest 2018 update) we need to start being aware of how long each step of code takes. Even if we consider using up to 1,000,000 cells it can take longer than we expect to finish our script. Attendance data can exist in large data sets. Consider a school of 400 students * 180 school days * 7 classes each of attendance. 504,000 cells of data. If a step of our program takes .01 seconds it will take 5,040 seconds to complete or 84 minutes or 1 hour and 24 seconds. And that’s just one step. So while we can pull each cell individually with sheet.getRange(row, column).getValue() we need to ask ourselves if it’s the most efficient. 

Our loop will instead pull all the data, once, and reference it in the computer memory. Below I concentrate on our main function our getColumnByName should remain in the script. I usually keep functions I use in larger functions at the bottom on all my scripts. 

function loopThroughData(){
  var ss= SpreadsheetApp.getActiveSpreadsheet();
  var sheet= SpreadsheetApp.getActiveSheet();
  var emailcol = getColumnByName(sheet, "Email");
  var data = sheet.getDataRange().getValues();
  for (var i =1;i<data.length;i++){
    Logger.log(data[i][emailcol-1]);
  }
}

The variable data is the used area of the sheet. It provides data in a matrix format. The first referenced data index is the row. The second is the column. We would use a reference to the index number of the row and column to reference a value. The index starts from 0 so row 0 is our header. In the sheet it’s row 1.Our column   numbers compared to the sheet are all offset by -1. To return the header cell containing “Email” we can use row 0 and column emailcol-1. We’d write it like this in our script.

data[0][emailcol-1]

The square brackets [] are used to indicate an index number. They can be strung together to reference indexes of indexes.

Now that we have a concept of indexes we are going to use a for loop to walk through our rows of data. For loops have three inputs to get them started. First a variable to count with set to the first number; var i = 0. Then the end of the loop as an expression. I usually think “while” in my head as I write it; i<data.length. And finally an increment for our counting variable to increase by with each loop; i++. JavaScript allows the short hand of using ++ to increment by 1 rather than i=i+1.

Here’s our initial for loop. 
for (var i =1;i<data.length;i++)

The loop needs to know what to do each time around. We put an action inside curly brackets { and }. We can also use the i variable in our action. 

data[i][emailcol-1]

With data we are saying return the second row (computers start from 0 and i starts being set as 1 se we are skipping our header row) and the column of the email (we assigned emailcol as the sheet column which is now offset in data by -1 so we offset the email column number by -1).

Putting it all together we can loop through the data and do something with it. Above we are returning whatever is in the email column and putting it in the log. We can instead send emails, create slides, make websites or many other operations which we would do manually but take a lot of time. Here's a sample sheet that sends out emails. 
Sample

Enjoy!

World’s Maker Faire


My favorite toy as a kid was a box. Small boxes, large boxes, any shape boxes. I loved to imagine them as something else. What could I make out of this box? 
I was lucky to be from a family of printers. I had an endless supply of boxes and paper to play with growing up. When you are taken to work on weekends so your mother can do the bookkeeping you have to find something to entertain yourself. I played with paper and boxes. 
Seeing the World Maker Faire this weekend I was brought back to my experimentations as a youth. I’m always inspired to make. If I wasn’t in a NYC apartment I’d have a garage or workshop specifically for making things. While wandering through the numerous exhibits watching kids stare in wonder I was struck by a few thoughts. 
What keeps us from providing opportunities for our students to create in class? We pack our curriculum with information and practice. But what about personal pursuits just for the sake of it? Teaching at LaGuardia high school I saw making in the curriculum everyday through students building a set; project based learning. They were working to achieve a goal as a collaborative group. But it was during the down time that I witnessed personal creations being worked on out of scraps. Students made things from materials that were readily available and no one was concerned with exhausting. 

I’d like to see other students have this possibility. It opens doors for new ideas along with developing problem solving skills. Iterating through a process teaches better than providing answers. 

Keys to a maker community:
  • Provide inexpensive materials in an inexhaustible supply. 
  • Carve out time time work and experiment.
  • Provide space to work where there isn’t a concern something will make a mess. 
  • Goals for what to make are necessary. 
  • Explore possibilities through conversation with materials in front of you. 
  • Prompt with open ended questions. “How can we change some one’s life?” 
Halloween as a TV

Send an Email with a Function: Part 2

There are times that automated email can be very helpful. The concept I'm going with here is aligning to a form response. When we ask folks to sign up for something we sometimes need them to have materials or may want to customize the response. Yes, in Forms you can customize a response to the form but what if you want to get fancy? Say people are filling out a form for an audition (I was in the entertainment industry so I'm using an example personal to me) they are going to need to audition materials and information for the particular role they are auditioning for. Here's where a script can help you to select who receives what.

Let's go back to our form we were collecting emails on. We'll keep this simple to begin then I'll give you a case where it can be expanded.

Open the Scripts Tools>Script editor. You should have:
function formResponse(e){
   Logger.log(e.values[0]);
}

Try changing it to:

function formResponse(e){
   Logger.log(e.values);
}

Submit a form response again. 

The 0 index of the form response is the timestamp. If we modify our log to get the value of e, Logger.log(e); we will get all the information returned. Logger.log(e.values); will return all the values of the form response. 
We want to identity the index of the email address. If you are collecting emails automatically if will likely be index 1 or e.values[1]. If you are collecting emails in your form it will be listed in the form at an index relative to all other information you may be collecting. If you have turned on the automatic collecting of email and turned it back off you may have also created an index with no information or null. 
Your incoming data may look like this [9/16/2018 11:03:52, clay@claycodes.org, Clay Smith, Danny] or [9/16/2018 11:05:21, , Clay, Danny, clay@claycodes.org] or something else. 

Each index is separated by a comma. If we want to get the values of a particular index we can use the index number. There are other methods but this is a good concept to start with. 

function formResponse(e){
   Logger.log(e.values);
}

Our function returns all the values to the log. It's now time to start doing something with the values. We want to send an email when some one submits the form. Let's set a variable to be the email address. We can do this with: 

var email = e.values[4]; 

The 4 index is from the image sample above. Your index may be different.

Next let's identify a file URL we want to include in our email. To make it easy here's a link to Bloom's Taxonomy verbs. https://drive.google.com/file/d/0BxUJf-bQ7_PzNnFKMXdOUjJGZGM/view?usp=sharing
We can assign this link to a variable by typing: var fileurl = 'https://drive.google.com/file/d/0BxUJf-bQ7_PzNnFKMXdOUjJGZGM/view?usp=sharing';
I've made up the variable name fileurl just like I did email. I'm using the apostrophe, ', mark to indicate the data is a string or typed letters and not something to be calculated. The apostrophe encloses the information on each end. 

We'll make a variable for the body and include some characters which will be escaped. Meaning they are normally reserved for programming but we will tell the program not to read them as part of the programing. 

var body = 'Thanks for filling out the form here\'s a document to read before we begin. \n ' + fileurl;
The \ is used to escape characters. The apostrophe typically represents the end of a string of characters, in this case we're using it grammatically. So we escape it with \'. Looking at the other escape character we see \n representing a new line. The + symbol is used to put things together. just like we would add 2 and 2 to get 4 a string gets added to make a longer string. The fileurl is a variable so it doesn't go in apostrophes or the system will think it's the word fileurl. 

Now let's put these elements together as an email. 

var mail = GmailApp.sendEmail(email, 'Subject goes here' , body);

The GmailApp loads a library of possible functions. We are using the pre-made sendMail which takes in three inputs, an email address, the subject of the email, and the body of the email. We could have used a variable for the subject but here I've entered it as a string to build on the idea that we don't have to always create variables. we could also replace the variable email with e.values[4] and it will still function.

Putting it all together looks like:

function formResponse(e){
  Logger.log(e.values);
  var email = e.values[4];
  var fileurl = 'https://drive.google.com/file/d/0BxUJf-bQ7_PzNnFKMXdOUjJGZGM/view?usp=sharing';
  var body = 'Thanks for filling out the form here\'s a document to read before we begin. \n ' + fileurl;
  var mail = GmailApp.sendEmail(email, 'Subject goes here' , body);
}

Google handles a lot of security for you. To be sure all the security is engaged for our function let's try running it. It will give us an error but before it does it will go through the permission checks and allow the mail feature to work. Click Run>Run function>formResponse
Accept the permissions and we'll be ready to submit through the Form. 


Go ahead and submit a new form with your email address. Check your email. You should get the response from the script you wrote. Congratulations!!!

So here's a use case which may help. Let's use the audition example. We'll add a dropdown of role with two selections. Danny or Sandy. We'll create an if statement to change the fileurl based on the role. We could also change the text of the body and subject by using the conditional statement but we'll keep it simple. 

function formResponse(e){
  Logger.log(e.values);
  var email = e.values[4];
  var role = e.values[3];
if(role == 'Danny'){
   var fileurl = 'https://drive.google.com/file/d/1-hGi-F7EAi4pBXoDoZHzLQ2qasJ4ie2F/view?usp=sharing';
}else if(role=='Sandy'){
   var fileurl = 'https://drive.google.com/file/d/1t7bVocmj9QaHApIIlc91l3RARg4gXoKa/view?usp=sharing
}
  var body = 'Thanks for filling out the form here\'s a document to read before we begin. \n ' + fileurl;
  var mail = GmailApp.sendEmail(email, 'Subject goes here' , body);
}

onFormSubmit Do Something: Part 1


Did you know Google Scripts can be triggered when a form submits to do something? Assigning a function to the onFormSubmit trigger and it will call that function. Let’s build one now to email a response to a submitted form.

We all have sign-ups we use with our school community. Sometimes when some one signs up we need to provide them with a document and other information. With Google Apps Scripts we can automatically send an email to the person that signed up with attachments.  

Let’s explore. 
Start by creating a form. Be sure to turn on the Email capture or make a field for people to type their email and validate it as an email. Add any other questions to your form that you like. Keep the Allow only 1 response off so we can test with our own email multiple times.

Our script will be built in Google Sheets. IN the form responses link the responses to a new sheet. Open the sheet and select Tools>Script editor. The editor will open in a new tab. Give a name to your script. Remove the pre-populated function, myFunction, so we are working with a blank area. Let’s begin our function:

function formResponse(e){
}

I’m calling it formResponse because it makes sense to me. I made up this name for the function. It’s also case sensitive. So if I use it later I have to be sure it’s typed exactly the same way. 
This function is going to take an input of e.  e represents the form response. Let’s first take a look at what e looks like when it’s received. We’ll use the Logger for this. In the function type Logger.log(e);

function formResponse(e){
   Logger.log(e);
}

Now let’s hook up the trigger before testing. Click on the button that looks like a clock. 

This will open the Trigger settings. Click "No triggers set up. Click here to add one now." to add a trigger.


It will likely automatically populate the function we create. The Run column identifies the function to activate. The Events column gives the selection to happen either when something in the spreadsheet happens or time based. The last column is the specific event triggering the function. We can add more than one function to activate when triggered and multiple triggers.


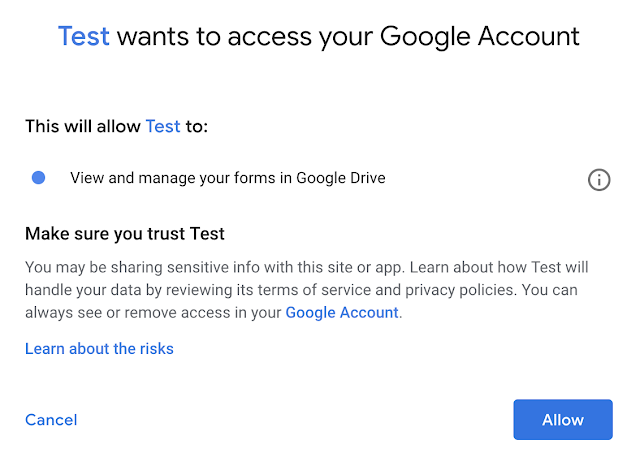
Click Save to save the trigger to our form. You will be asked to approve some permissions. Click Review Permissions. Select your account, then click Allow on the next screen.


Now let's see what data looks like when it comes into the form. Open the form in submission mode. Fill it out and click submit. Our function will have captured the submission in the Logger. To get to the logger click View>Logs. This will open a window floating over our script with the data from the form submission.

When we look at the Logger we are seeing the form submission in the form of a program object. Let’s look closely at the label values. Notice it equals an open square bracket, "[",  then some comma separated information followed by a closed square bracket, "]". This is the information submitted through the Form as a list. A list is separated data with an unseen reference called an index. The index starts counting from 0. The first piece of data in the list is the timestamp. Let’s grab the timestamp and show it in our log. To return that value only we would use the input object e and the array values in e with the index 0. Logger.log(e.values[0]);

function formResponse(e){
   Logger.log(e.values[0]);
}

When we look at the Logger now we see only the timestamp. With this method we can identify the Email or other response data. We'll look further into how to use the response to do something in the next post. 

Google Apps Script Programming

I’ve been asked a few times to teacher a course for teachers on Google Apps Scripts. So I’m going to begin talking out the structure here until I can get a class together. I'll be working with Chrome to explore Scripts.

Scripts are instructions for a computer. The are read just as they are. they are a form of coding but not all coding or programming is scripting. Some languages have to be turned into specific computer read forms. This translation is called compiling. Scripts are interpreted just as they are. Most web interactions are done with scripts. Google Apps Script uses JavaScript. Typically javascript runs in the users computer. Google Apps Scripts run in the Google Cloud on the google servers. This makes the power of it consistent despite the user's machine. For a JavaScript course check out Codecacademy. I'll be using Google Apps Scripts, the Information on javascript can be helpful for a deeper under standing but not mandatory.


Let’s open Google Apps Scripts. Select One of the main GSuite Apps; Sheets, Docs, or Slides.  
On the top menu bar under Tools select Scripts
This opens a new tab with scripting tools to begin programing Forms opens slightly different from the three dots menu.

There’s a number of features within this tool but let’s keep it simple to begin. In Scripts we write functions. Let’s say you want a series of things done to come up with a particular result. We align code together in a function to be done in order to return some result. 

Usually we make up our own names for functions. The naming of things is usually where people get confused. Some names are reserved by the language creators to do things. To begin we’ll use a reserved function name in our code. JavaScript is case sensitive. So Function is different than function. And X is different than x. Mind your cases as you work. 

In the scripting area we are seeing:
function myFunction(){
}

We can remove this. Basically, it’s a prewritten function which does nothing. Let’s write our own. 
function:

function onOpen(){
  alert(“Hello World”);
}

This function uses a few reserved words.

  • function tells the browser that this is a series of code to be run in the order specified. 
  • onOpen is a reserved function name that binds the function to the document opening. 
  • alert is a reserved name for a function in JavaScript. 

The characters in our function also represent things.

  • The first () after onOpen are there to take in a value. 
  • The { is the start of our function. 
  • The } is the end of our function. 
  • Anything between { and } is part of our function,
  • alert uses () to take in a value. This is synonymous with the onOpen parentheses, (), which can take in a value. 
  • The “ “ are identifying what’s between them as words or what’s called a string datatype. 
  • The ; ends the line of code and tells to browser to move to the next line. 

For a function it must be structured in this way with <some name> being what you want to call your function and action code; being what you want you function to do. 
function <some name>(){
  action code;
  action code;
}

If you haven’t experimented with onOpen yet try it now. Close the document you were working on. Open your document back up from the drive. Give it a moment. Did you get an alert saying “Hello World”? If you did congratulations! If not compare your code to mine meticulously or copy and paste it. Remember it’s case sensitive. 

Let’s consider a usage for our pop-up. It’s great for quick disappearing messages. So directions would not be good here. Perhaps you want to give a shout out to a birthday, a high achiever, someone who did something special or unique. What about a quick reminder, “use the references”, “check your grammar”, “trip on Friday!”. Whatever you write is general to anyone who opens it right now. Can we get specific for individuals? It’s possible. For now let’s celebrate that you just wrote some code that you can use in class right away.

Congratulations!


Any copy of a Doc, Sheet, Slides, or Form will contain the script. If you write some great code you want to use in another file you can copy the code and past it to the new file’s scripting area or copy the file. 

Social Emotional Well-Being During Online Teaching and Learning

The world is a bit nutty right now because of the COVID-19 pandemic. Schools are switching to online learning and parents are working from...